Trainz Diamond Crossing Tutorial
We will show you here how to make a functioning diamond crossing using an Enhanced Interlocking Tower or EIT. The EIT asset we will use in our demonstration is the 'CDE Enhanced TRC3 invisible Interlocking Tower' <KUID:647907:100961>. All assets referenced are available on the DLS or from your Content Manager. The CDE EIT differs from the built-in version made by pguy in that it is pre-set to allow eaiser setup of the diamond crossing example shown here. To learn more about additional features of enhanced interlocking towers and trc interaction look here;
Trainz Wiki - HowTo/Configure An Interlocking Tower
Trainz Wiki - Enhanced Interlocking Tower assets
Step 1
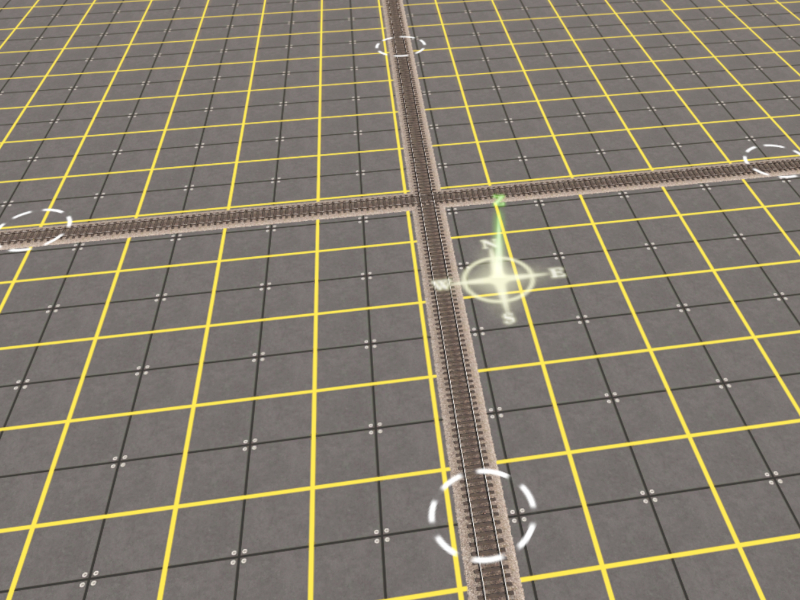
To begin you will need to Create or Edit a Route using Surveyor. Then place your crossing tracks for the diamond crossing. It does not matter at what angle the tracks cross. Our example is at 90 degrees.
 Step 2
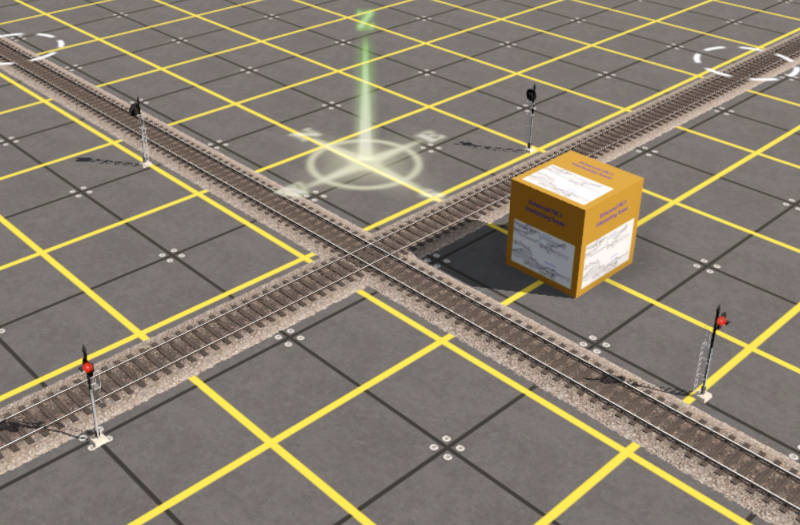
Next place 4 signals, one for each approch into the diamond. Most signals will work, but we recommend using Absolute types, or 04 in Trainz. Absolute signals are usually connected to an interlocking device controlled by a block operator or train dispatcher. Their most restrictive aspect is 'Stop' and trains cannot pass them at Stop unless they obtain special authority. Absolute signals will default to displaying Stop unless expressly cleared by the control authority. We are using the <kuid:-25:859> Signal USA 04. Make sure the signals are facing outward from the crossing diamond intersection. Then place the <kuid:647907:100961> CDE Enhanced TRC3 invisible Interlocking Tower. Name each of the assets with a prefix that matches. In this example, we will name the Enhanced Interlocking Tower 'EIT01', and the signals with the same prefix, example EIT01 North, EIT01 South, EIT01 East and EIT01 West.
Step 2
Next place 4 signals, one for each approch into the diamond. Most signals will work, but we recommend using Absolute types, or 04 in Trainz. Absolute signals are usually connected to an interlocking device controlled by a block operator or train dispatcher. Their most restrictive aspect is 'Stop' and trains cannot pass them at Stop unless they obtain special authority. Absolute signals will default to displaying Stop unless expressly cleared by the control authority. We are using the <kuid:-25:859> Signal USA 04. Make sure the signals are facing outward from the crossing diamond intersection. Then place the <kuid:647907:100961> CDE Enhanced TRC3 invisible Interlocking Tower. Name each of the assets with a prefix that matches. In this example, we will name the Enhanced Interlocking Tower 'EIT01', and the signals with the same prefix, example EIT01 North, EIT01 South, EIT01 East and EIT01 West.
 Step 3
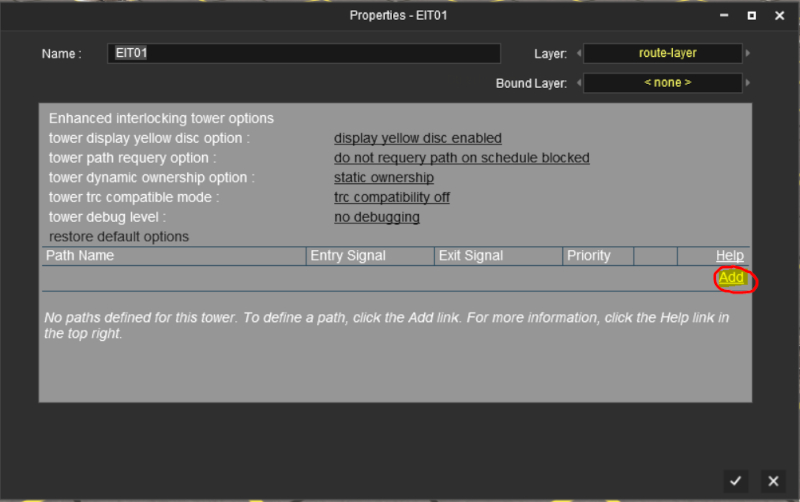
Now we can create our 'Paths'. Open the dialog box for the EIT, then click on the 'Add' link on the right side of the dialog. It will take you to sub-menu for the 'Path' you are about to create. We will create a total of 4 'Paths', one for each approach into the intersection.
Step 3
Now we can create our 'Paths'. Open the dialog box for the EIT, then click on the 'Add' link on the right side of the dialog. It will take you to sub-menu for the 'Path' you are about to create. We will create a total of 4 'Paths', one for each approach into the intersection.
 Step 4
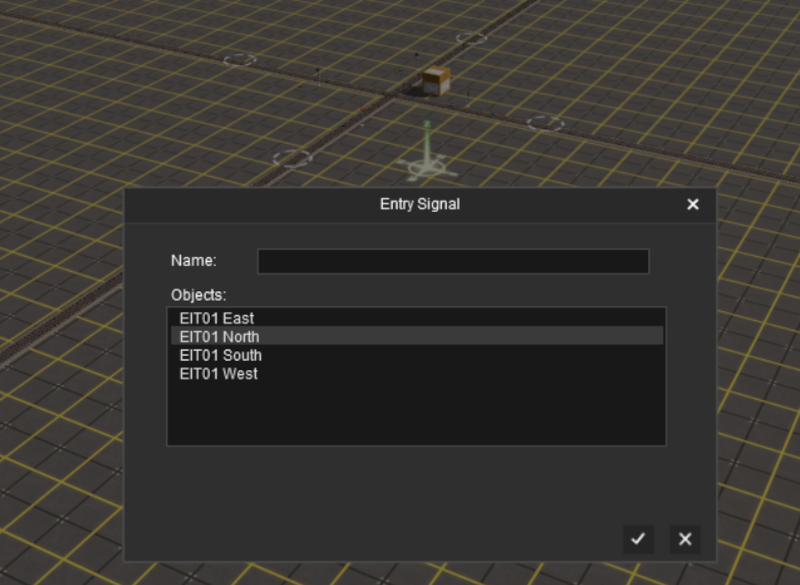
The dialog that opens is a list of trackside objects that the EIT can see in your route. You can type a search string of the prefix you used to narrow the list to only the assets involved with your EIT if you added a prefix to each signal you placed in the steps above. When adding paths keep in mind that the order you add them will assign the priority over which path the EIT selects when 2 consists request access at the same time. In our example the priorties will be from North, South, East and then West, so we will enter them in that order.
Step 4
The dialog that opens is a list of trackside objects that the EIT can see in your route. You can type a search string of the prefix you used to narrow the list to only the assets involved with your EIT if you added a prefix to each signal you placed in the steps above. When adding paths keep in mind that the order you add them will assign the priority over which path the EIT selects when 2 consists request access at the same time. In our example the priorties will be from North, South, East and then West, so we will enter them in that order.
 Step 5
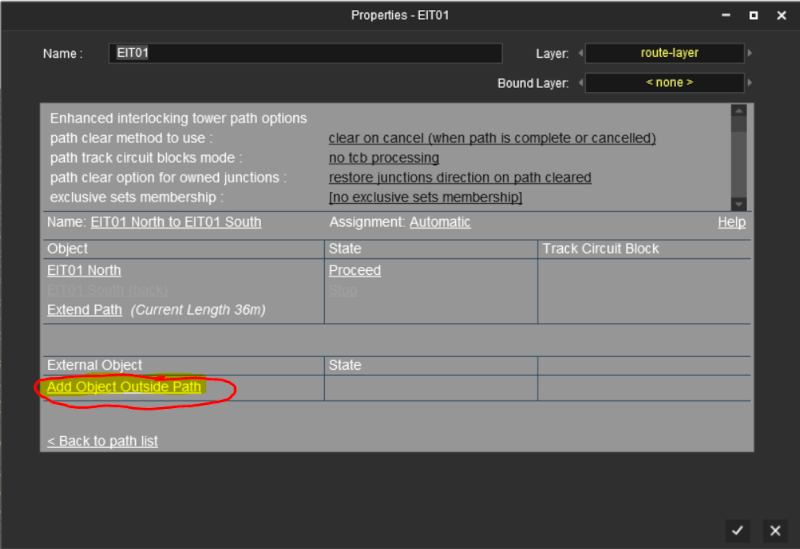
Once you select the Entry Signal, you will be returned to the sub-menu, which will now show your first 'Path'. It will have automatically named it with the 'Name of Entry Signal to Name of End Signal'. Below that you can now add what you want the EIT to do when this path is used. Click on the 'Add Object Outside Path' link to assing signals to control. You do not need to set the 'State', or any other settings if you are using the CDE EIT.
Step 5
Once you select the Entry Signal, you will be returned to the sub-menu, which will now show your first 'Path'. It will have automatically named it with the 'Name of Entry Signal to Name of End Signal'. Below that you can now add what you want the EIT to do when this path is used. Click on the 'Add Object Outside Path' link to assing signals to control. You do not need to set the 'State', or any other settings if you are using the CDE EIT.
 Step 6
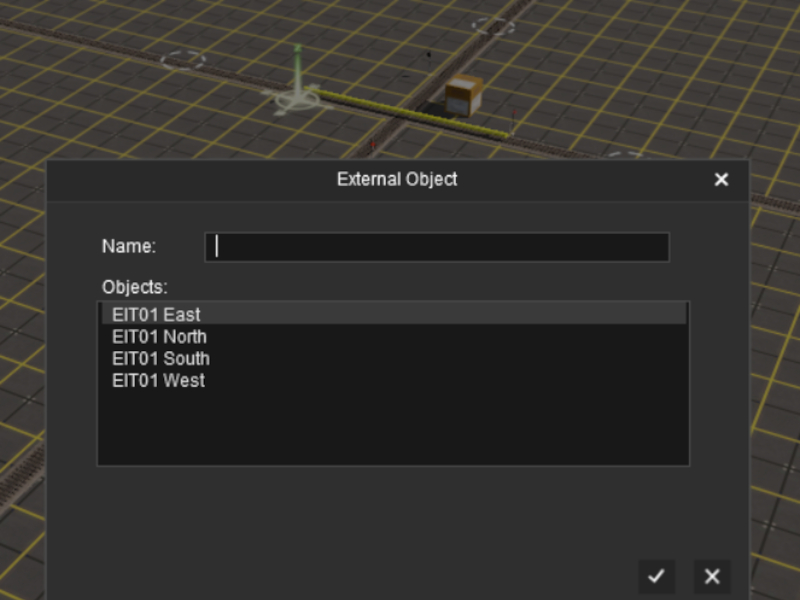
The External Object dialog will pop up and work the same as the select Entry Signal dialog. Select the first crossing signal, then click on the 'Add Object Outside Path' link again to assing the second crossing signal.
Step 6
The External Object dialog will pop up and work the same as the select Entry Signal dialog. Select the first crossing signal, then click on the 'Add Object Outside Path' link again to assing the second crossing signal.
 Step 7
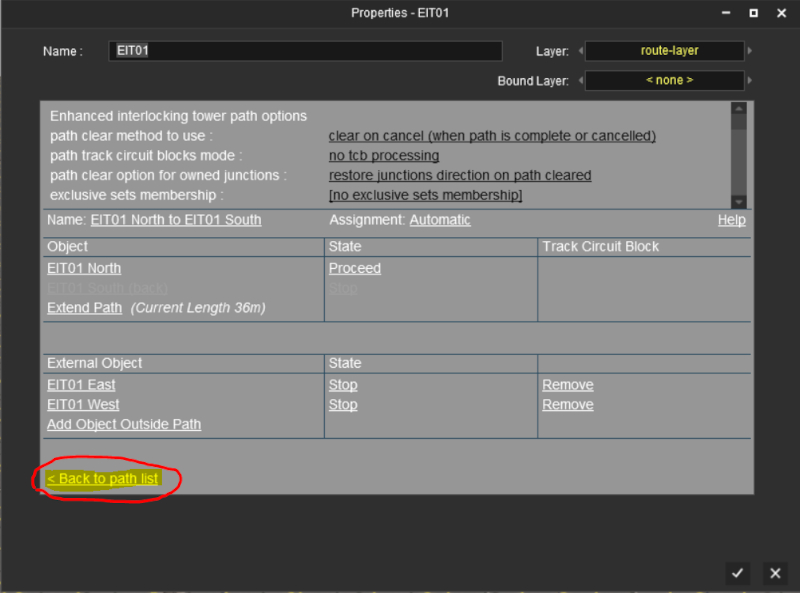
When you are finished selecting the 2 signals on the crossing path, click 'Back to path list' link. This will return you to the main menu page where you can add the rest of the paths.
Step 7
When you are finished selecting the 2 signals on the crossing path, click 'Back to path list' link. This will return you to the main menu page where you can add the rest of the paths.
 Step 8
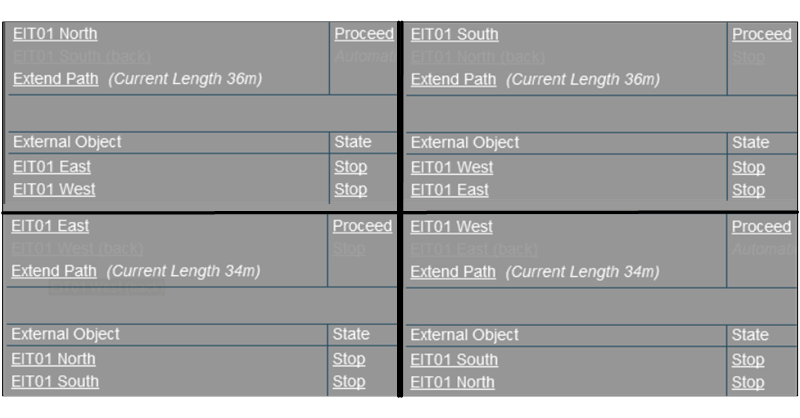
Study the 4 paths below to see how each one controls the others.
Step 8
Study the 4 paths below to see how each one controls the others.
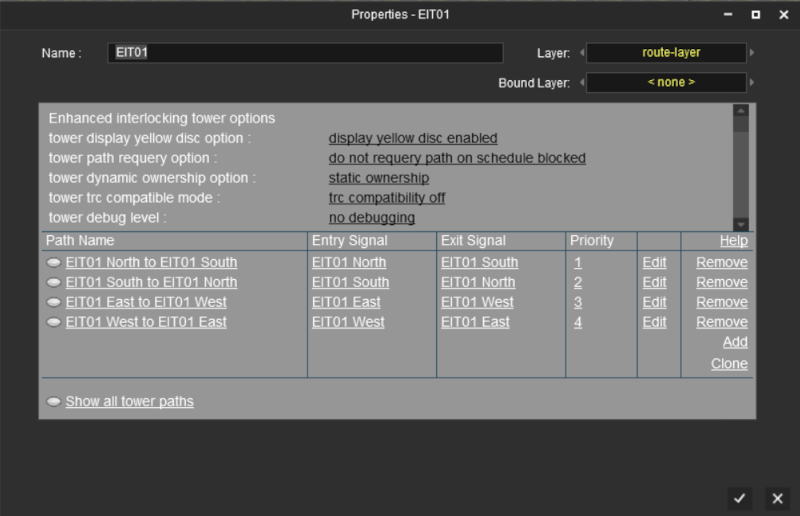
 Step 9
When your done the main menu should look like this.
Step 9
When your done the main menu should look like this.
 Done!
Your diamond crossing intersection should now be done and ready to use.
Done!
Your diamond crossing intersection should now be done and ready to use.
|